
Risk management in trading is the set of pre-trade rules that define how much capital you're willing to lose before you enter a position. The single most important action: set a fixed percentage of your account you'll risk per trade, calculate the exact position size that enforces it, and place a stop-loss at the price that proves your trade idea wrong. Do those three things before every trade, and you've already separated yourself from most retail traders.
Before placing any trade, run through this checklist:
- Calculate your allowed dollar risk (account equity × your chosen % per trade)
- Determine your stop-loss level at a logical invalidation point, not an arbitrary distance
- Divide allowed dollar risk by stop distance to get your position size
- Confirm the trade doesn't push your daily or total drawdown past your preset limit
Table of Contents
- What does risk actually mean in trading?
- What types of risk do traders face?
- What are the core risk-management rules every trader needs?
- How do you calculate position size? Step-by-step with examples
- Which sizing method fits your trading style?
- Where should you place your stop-loss?
- What should your trading plan include?
- Why does trader psychology matter as much as the rules?
- How does Decision Intelligence reinforce risk discipline?
- Key Takeaways
- Why I treat risk rules as sacred, not suggestions
- How EI ALGOS helps you enforce what you've learned here
- Useful sources and tools for further reading
What does risk actually mean in trading?
Risk in trading is a specific, measurable number: the maximum dollar amount you can lose on a single position if your stop-loss is hit. It's not a feeling, and it's not the same as volatility. Risk = entry price minus stop price, multiplied by position size. Reward is the same math in the other direction. You control risk before the trade opens; you can't control it after.
Why does this matter for survival? Compounding works both ways. A 50% drawdown requires a 100% gain just to break even. Keeping losses small preserves the capital and the psychological bandwidth you need to stay in the game long enough to find high-probability setups.
Here's a concrete illustration. On a moderate account risking a small percentage per trade, multiple consecutive losses can be painful but generally survivable. That's painful but survivable. With no limit, ten trades at $500 each wipes half your account in a single bad streak. The math isn't dramatic; it's just arithmetic that most traders ignore until it is too late.
Pro Tip: Treat risk as a pre-trade question, not a post-trade emotion. Ask "how much can I lose on this?" before you ask "how much can I make?"
What types of risk do traders face?
Trading risk isn't one thing. Each type demands a different control, and confusing them leads to the wrong fix.
- Market (directional) risk: The price moves against your position. Control: position sizing and stop-losses.
- Volatility risk: Wider-than-expected price swings stop you out even when your direction is correct. Control: ATR-based stops and reduced size during high-volatility periods.
- Liquidity risk: You can't exit at the price you want because the market is too thin. Control: trade liquid instruments; use limit orders for exits in thinly traded names.
- Gap/overnight risk: A stock gaps down 15% at the open after an earnings miss, blowing past your stop. Control: reduce overnight exposure, use options for tail protection, or avoid holding through binary events.
- Leverage/margin risk: A 10:1 leveraged position turns a 2% adverse move into a 20% account loss. Control: size positions in notional terms, not just margin terms; know your true dollar exposure.
- Concentration/correlation risk: Five "different" positions all move together because they share the same sector or macro driver. Control: diversify across uncorrelated instruments; monitor portfolio beta.
- Execution/slippage risk: Your stop triggers at $49.80 instead of $50.00 because of a fast market or wide spread. Control: account for slippage in your position-size math; use stop-limit orders carefully.
- Behavioral risk: You move your stop further away because you "know" the trade will come back. Control: pre-trade rules, decision scoring, and hard automated stops.
The controls map directly to the risk type. Behavioral risk is the one most traders underestimate, and it's the one that makes all the other controls fail.
What are the core risk-management rules every trader needs?
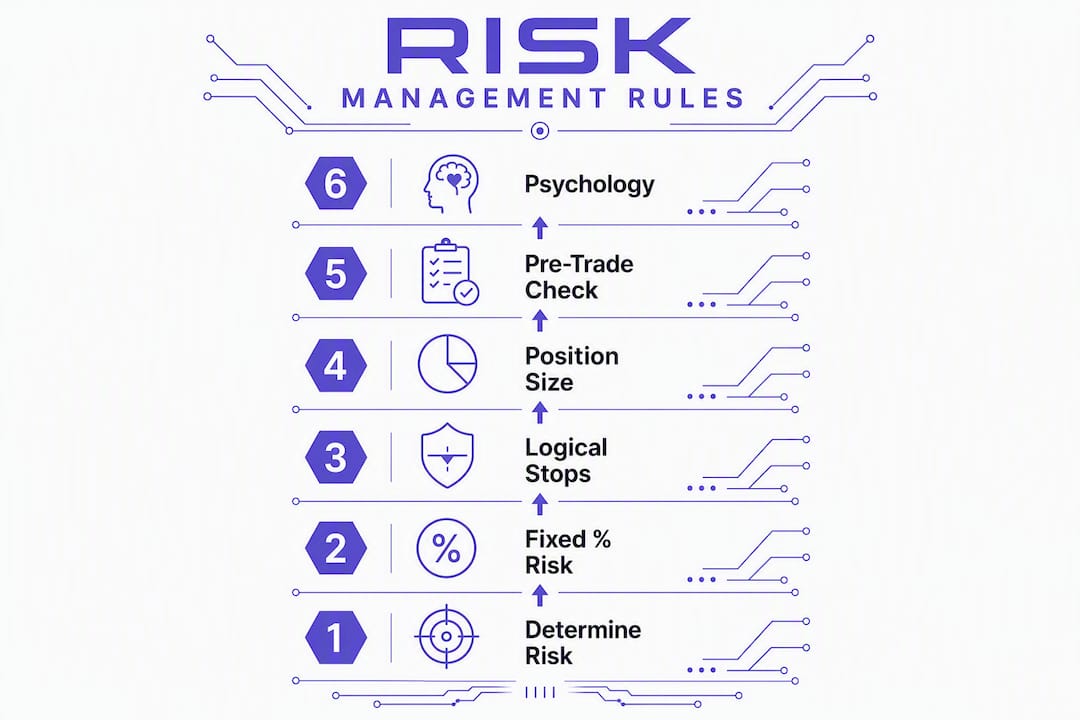
Six rules form the foundation of any serious trading plan. Skip one and the others start to leak.
1. Determine risk before entry. Never open a position without knowing the exact dollar amount you stand to lose. This is non-negotiable.
2. Risk a fixed percentage per trade. The CME Group's 2% rule is the most widely cited industry benchmark: risk no more than 2% of account equity on any single trade. On a $50,000 account, that's a maximum loss of $1,000 per trade. Many experienced traders use 1% or even tighter percentages as their account grows, because the dollar exposure scales with equity.
3. Use logical stop-losses. Place stops at the price that invalidates your trade thesis, not at a round number or an arbitrary distance. More on this in the stop-loss section below.

4. Calculate position size mathematically. The formula is: position size = allowed dollar risk ÷ stop distance. No guessing, no "feels about right."
5. Set a minimum risk/reward expectation. Most traders require at least a 1:2 risk/reward ratio before entering. A 1:2 ratio means you can be wrong 40% of the time and still break even before commissions.
6. Enforce daily and overall drawdown limits. A daily loss limit (e.g., 3% of account) stops a bad day from becoming a bad week. A maximum drawdown limit (e.g., 10% of account) triggers a mandatory pause for review.
Strict downside control gives traders the "padding" to survive volatility and stay in the game long enough to find high-probability setups. Without it, a single bad session can undo weeks of disciplined work.
To make these rules unavoidable: build a pre-trade checklist into your routine, fill out a trade ticket before every entry (instrument, entry, stop, size, dollar risk), and set a hard daily stop in your broker platform where possible.
How do you calculate position size? Step-by-step with examples
Position sizing is where rules become real numbers. The core formula is:
Position size = Allowed dollar risk ÷ (Entry price − Stop price)
"Allowed dollar risk" is simply your account equity multiplied by your chosen risk percentage. The stop distance is the gap between your entry and your stop-loss level.
Step-by-step: equity stock example
- Account equity: $25,000
- Risk per trade: 1% → Allowed dollar risk = $250
- Entry price: $85.00
- Stop-loss price: $82.50
- Stop distance: $85.00 − $82.50 = $2.50
- Position size: $250 ÷ $2.50 = 100 shares
Step-by-step: futures example (ES mini contract)
- Account equity: $50,000
- Risk per trade: 1% → Allowed dollar risk = $500
- Entry: 5,200 points; Stop: 5,194 points
- Stop distance: 6 points × $50 per point = $300 per contract
- Position size: $500 ÷ $300 = 1.67 contracts → round down to 1 contract
Always round down when the math gives a fraction. Rounding up increases your actual risk above your limit.
How volatility affects stop distance: When a stock's Average True Range (ATR) is wide, your logical stop must sit further from entry. A wider stop distance means fewer shares for the same dollar risk. Volatility-adjusted stops reduce the chance of being stopped out by normal market noise, but they force smaller position sizes. That's the trade-off, and it's the right one.

Sample position-sizing table
| Account Equity | Risk % | Allowed $ Risk | Entry | Stop | Stop Distance | Position Size |
|---|---|---|---|---|---|---|
| $25,000 | 1% | $250 | $85.00 | $82.50 | $2.50 | 100 shares |
| $50,000 | 2% | $1,000 | — | — | — | — |
| — | 1% | $1,000 | — | — | — | — |
You can copy this table directly into a spreadsheet and replace the inputs for any trade. Trading Risk Lab offers position-sizing calculators and Monte Carlo risk-of-ruin simulations if you want to stress-test your numbers beyond a single trade.
Which sizing method fits your trading style?
Fixed-percentage sizing is the starting point, but it's not the only tool. Here's how the main approaches compare:
| Method | How It Works | Pros | Cons | Best For |
|---|---|---|---|---|
| Fixed % (1–2% rule) | Risk a set % of equity per trade | Simple, consistent, scales with account | Ignores volatility; same size in calm and chaotic markets | All styles, especially beginners |
| Kelly Criterion | Size = edge ÷ odds ratio | Mathematically optimal for long-run growth | Aggressive; requires accurate win rate and R:R estimates; prone to over-sizing | Advanced traders with large sample sizes |
| ATR-based sizing | Stop distance = ATR multiple; size adjusts | Adapts to market conditions | More complex; ATR can spike suddenly | Swing and position traders |
| Volatility parity | Equal risk contribution across positions | Balances portfolio exposure | Requires correlation tracking | Multi-position portfolios |
| Scaling in/out | Add to winners; reduce losers | Improves average entry; limits early exposure | Increases complexity; can mask poor entries | Experienced traders with clear rules |
| Protective hedging | Options or inverse instruments offset exposure | Caps tail risk | Costs premium; reduces net return | Overnight/event risk, large positions |
A note on Kelly: The formula is f* = (bp − q) / b, where b is the odds received, p is win probability, and q is loss probability. The problem is that real-world win rates and payoff ratios are estimates, not certainties. Overestimating your edge by even a small margin pushes Kelly toward sizes that can cause severe drawdowns. Half-Kelly is the practical default.
Adapting to style: Day traders typically use tighter stops and smaller sizes because they trade more frequently. Swing traders can tolerate wider ATR-based stops but should reduce overall position count to keep total portfolio risk manageable. Leveraged instruments (futures, forex, options) require sizing in notional terms, not margin terms, or the 2% rule becomes meaningless.
Where should you place your stop-loss?
The primary guide for stop placement is logical invalidation: the price level that proves your trade idea wrong. If you bought a breakout above $100 because you expected continuation, the stop belongs just below the breakout level, not at $98 because that's "2% away."
Common placement techniques:
- Support/resistance: Place the stop just below a key support level (for longs) or above resistance (for shorts), giving the trade room to breathe without crossing the line that breaks the thesis.
- ATR multiple: Set the stop at 1.5× or 2× the instrument's ATR below entry. This accounts for normal daily noise and reduces premature stop-outs in volatile markets.
- Moving-average buffer: Use a key moving average (e.g., 20-day EMA) as a dynamic stop anchor, placing the stop a small buffer below it.
- Time-based stops: Exit a position if it hasn't moved in your favor within a defined time window, regardless of price. Useful for day traders.
Common mistakes that destroy accounts:
- Removing a stop after entry because the trade "looks like it's turning around"
- Moving the stop further away to avoid being stopped out (this converts a defined risk into an undefined one)
- Using arbitrary stop distances ("I'll stop at $5 below entry") with no reference to the chart
- Ignoring spread and slippage, which means your realized loss is always slightly larger than planned
Pro Tip: Before adopting a stop style, backtest it on at least 30 historical trades. Track your planned stop price versus your actual exit price. If slippage consistently exceeds 0.3–0.5% of trade value, adjust your allowed dollar risk calculation to account for it.
What should your trading plan include?
A trading plan is the document that makes your rules enforceable. Without it, every decision becomes discretionary, and discretionary decisions under pressure tend to go wrong.
Mandatory plan items:
| Plan Element | What to Specify |
|---|---|
| Account size | Starting equity and current equity |
| Per-trade risk % | Your chosen percentage (e.g., 1%) |
| Stop method | ATR-based, support/resistance, or fixed % |
| Target R:R | Minimum ratio before entry (e.g., 1:2) |
| Max daily loss | Dollar or % limit that triggers a session stop (e.g., 3%) |
| Max overall drawdown | Total % loss that triggers a mandatory review pause (e.g., 10%) |
| Allowed instruments | List of markets/tickers you're permitted to trade |
| Position-sizing rule | The formula you use, with inputs defined |
Enforcement tools: A pre-trade checklist (print it or keep it open on screen), a trade-ticket habit where you fill in every field before clicking buy or sell, and broker-level daily loss limits where your platform supports them. Some traders set a calendar reminder at the end of each session to review the day's trades against the plan.
Funded accounts vs. retail accounts: If you're trading a funded challenge account, the drawdown rules are typically stricter and non-negotiable (often 5% daily, 10% total). Retail accounts give you more flexibility, but that flexibility is a trap without self-imposed limits. Stress-test your plan by running it through a scenario where you hit your daily limit on day one of a week. Does the plan tell you clearly what to do next? It should.
For recording trades, a structured stock trading journal keeps your plan honest. Pair it with the pre-trade template from the position-sizing section and you have a complete decision record for every trade.
Why does trader psychology matter as much as the rules?
Rules on paper don't trade. You do. The behavioral failure modes that blow accounts aren't exotic; they're predictable.
Over-trading after a win: A strong morning session creates overconfidence. Position sizes creep up, trade frequency increases, and the afternoon gives back everything the morning made. This is size creep, and it's one of the most common P&L killers.
Revenge trading after a loss: A stopped-out trade triggers the urge to "get it back" immediately. The next trade is larger, less planned, and often in the same direction as the loser. Two bad trades become four.
Confirmation bias: You've decided the stock is going up. You read every piece of news as bullish and dismiss the bearish signals. The position grows beyond your plan because you're "sure."
Process-level fixes work better than willpower alone. A pre-trade decision score forces you to evaluate the setup on objective criteria before sizing. A forced pause rule (e.g., a mandatory 15-minute break after any loss exceeding 1.5% of account) interrupts the emotional loop. Accountability journaling, where you record not just what you traded but why and how you felt, surfaces patterns that pure P&L data misses.
Process-oriented trading treats each trade as a decision to be evaluated, not just a result to be recorded. That reframe alone changes how traders respond to losses.
Pro Tip: Use a decision score of 1–10 before each trade, rating setup quality, risk/reward clarity, and emotional state. If the score is below 7, reduce size by half. If it's below 5, skip the trade. This one habit gates your worst decisions before they cost you money.
How does Decision Intelligence reinforce risk discipline?
Decision Intelligence is a framework that evaluates the quality of a trading decision before the trade is placed, independent of whether the trade wins or loses. EI ALGOS' platform applies this through a six-factor analytical engine that scores each setup on behavioral and process criteria, not on price predictions.
Here's a simplified workflow:
- Pre-trade score: Before entry, the platform evaluates the setup against six behavioral and process factors. A low score flags a decision that violates your own rules, even if the chart looks attractive.
- Risk filter: The score feeds into a size recommendation. A high-quality setup at your standard 1% risk. A borderline setup at half size. A rule-violating setup blocked entirely.
- Live trade management: The platform tracks the trade against your plan in real time, flagging deviations.
- Post-trade feedback loop: After the trade closes, the LIANA assistant surfaces patterns in your decision history, showing where behavioral errors cost you money.
For example: a trader with a rule against trading in the first 15 minutes of the session enters a setup at 9:35 AM. The decision score flags the rule violation. The trader can override it, but the flag creates a pause, and that pause is often enough to prevent the trade.
EI ALGOS' Decision Intelligence platform also includes options analysis and strategy pattern detection, giving traders a fuller picture of their behavioral tendencies over time. The LIANA assistant provides personalized process feedback based on your actual trade history.
Note: Decision Intelligence is a discipline and learning tool. EI ALGOS does not provide trade signals or investment recommendations. Nothing on the platform constitutes financial advice.
Key Takeaways
Effective risk management in trading requires three things working together: a fixed per-trade risk percentage, a mathematically derived position size, and a stop-loss placed at logical invalidation, enforced every session without exception.
| Point | Details |
|---|---|
| The 2% rule as a baseline | Risk no more than a small fixed percentage of account equity per trade to limit losses. |
| Position sizing is math | Divide your allowed dollar risk by stop distance to get exact shares or contracts before every entry. |
| Stops belong at invalidation | Place stops where the trade idea is proven wrong, not at an arbitrary distance from entry. |
| Daily and drawdown limits | A 3% daily loss limit and a 10% overall drawdown limit prevent a bad session from becoming a blown account. |
| Eialgosinc enforces process | EI ALGOS' six-factor decision scoring gates trade size and flags rule violations before entry, reinforcing discipline without signals. |
Why I treat risk rules as sacred, not suggestions
Most traders treat risk rules the way people treat speed limits: they follow them when it's convenient and bend them when they're in a hurry. The problem is that markets punish inconsistency in ways that feel random but aren't. The trades where you bent the rule are almost always the ones that hurt the most, because you were already in a compromised state when you made them.
What changed my thinking wasn't a single blowup. It was tracking the pattern over dozens of trades and noticing that my worst losses shared one feature: I had overridden a rule I'd set for myself. Not because the market was unpredictable, but because I had decided, in the moment, that this time was different. It never was.
The conventional wisdom says risk management is about protecting capital. That's true, but it's incomplete. Rules also protect your decision-making capacity. A trader who has stayed within their limits all week thinks more clearly on Friday afternoon than one who is trying to recover from Tuesday's oversized loss. That clarity compounds over time in ways that no single winning trade can replicate.
EI ALGOS was built around exactly this insight: that the quality of the decision matters more than the outcome of any individual trade. The six-factor scoring engine and LIANA assistant exist to make that quality visible and measurable, session after session.
How EI ALGOS helps you enforce what you've learned here
Every rule in this guide is straightforward to understand and genuinely hard to follow under pressure. That gap between knowing and doing is where most traders lose money.
EI ALGOS closes that gap by scoring your decision before you trade. The platform's six-factor analytical engine evaluates behavioral and process criteria, flags rule violations, and adjusts size recommendations in real time. LIANA, the AI assistant, builds a personalized feedback profile from your trade history, showing you exactly where your process breaks down and why.
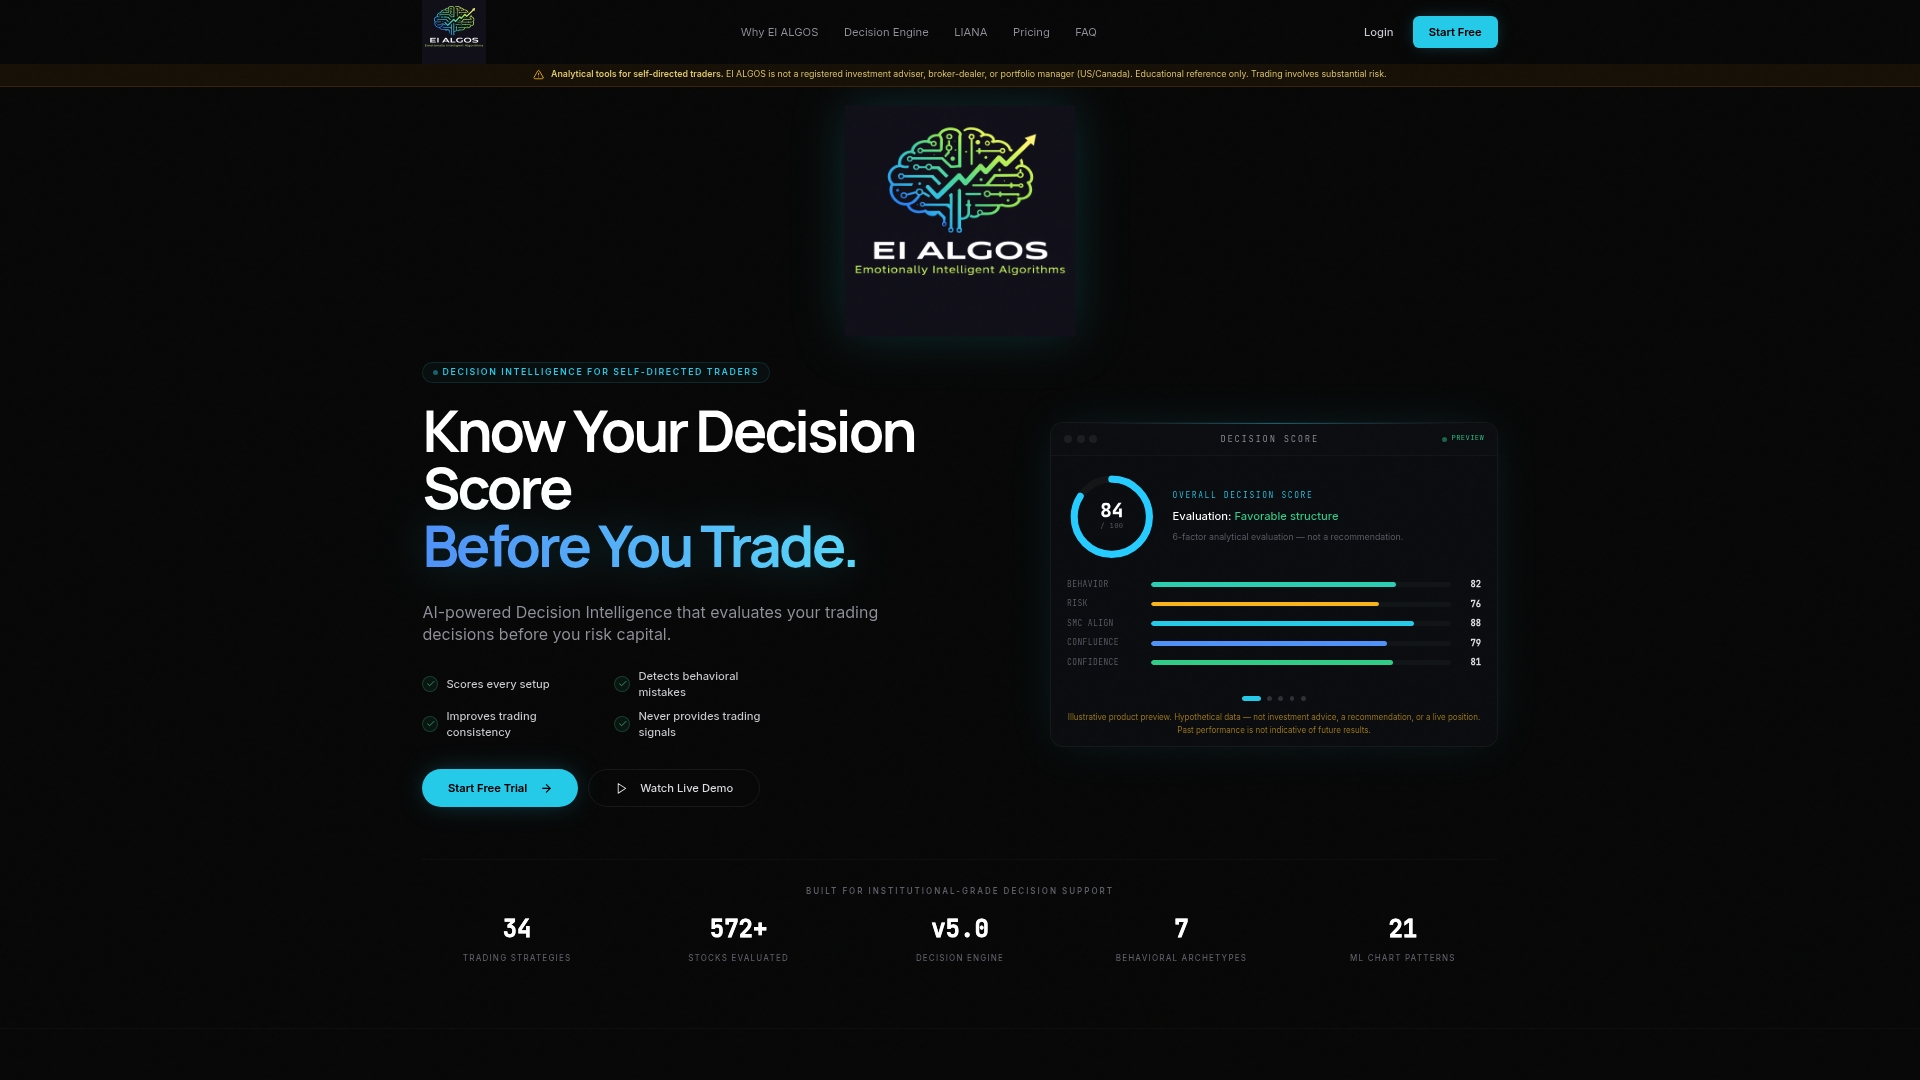
This isn't a signal service. EI ALGOS doesn't tell you what to buy or sell. It tells you whether the decision you're about to make meets the standards you set for yourself. That distinction matters for traders who want to build a repeatable process, not just follow someone else's calls.
If you're ready to put the rules in this guide to work with a system that enforces them, explore the EI ALGOS decision-scoring guide or view subscription options to get started.
This article is general educational information, not financial advice. Confirm any trading rules, margin requirements, or regulatory obligations with a qualified financial professional or your broker.
Useful sources and tools for further reading
These resources back the rules in this guide and give you calculators to run your own numbers:
- CME Group: The 2% Rule: The industry-standard benchmark for per-trade risk limits, with worked examples. Start here if you want the authoritative source on fixed-percentage sizing.
- Investopedia: Risk Management Techniques for Active Traders: Solid conceptual overview of stop-loss strategies, diversification, and hedging, with technical-analysis anchors for stop placement.
- QuantInsti: Trading Risk Management: Covers ATR-based sizing and volatility-adjusted stops in depth; useful for traders moving beyond fixed-percentage rules.
How to use these together: Run your position-sizing math in Trading Risk Lab, cross-check the 2% rule logic against the CME source, and use the MyFundedCapital template as the basis for your pre-trade checklist. The QuantInsti article is the right next read once you're comfortable with fixed-percentage sizing and want to adapt your stops to market conditions.